This Florida Cave Trail Promises a Thrilling Hike With Jaw-Dropping Views
Ready for a Florida hike that feels otherworldly yet totally doable in a morning? Dames Cave Trail tucks limestone caverns, sinkholes, and rugged forest paths just minutes from the road, delivering instant adventure without the fuss. You will hear mixed reviews, but with the right expectations and a plan, the payoffs are real and the views surprising.
Lace up, bring a light, and let curiosity lead the way.
1. Finding The Trailhead On Trail 22
Trail 22 is your gateway to Dames Cave, and the start can feel almost secret. Look for the brown trashcan near the sandy pull-off, then slip into a lightly worn path beneath pines and scrub. It is unassuming at first, but the forest opens just enough to guide your steps forward.
Expect a half mile stroll to the caves, mostly flat with occasional roots and patches of sugar sand. Cell service is spotty, so download an offline map or drop a pin before you walk. Early arrival helps you beat weekend crowds and find parking without stress.
Bring water, a small first aid kit, and closed-toe shoes. Keep noise low, listen for birds, and let the forest set the tone.
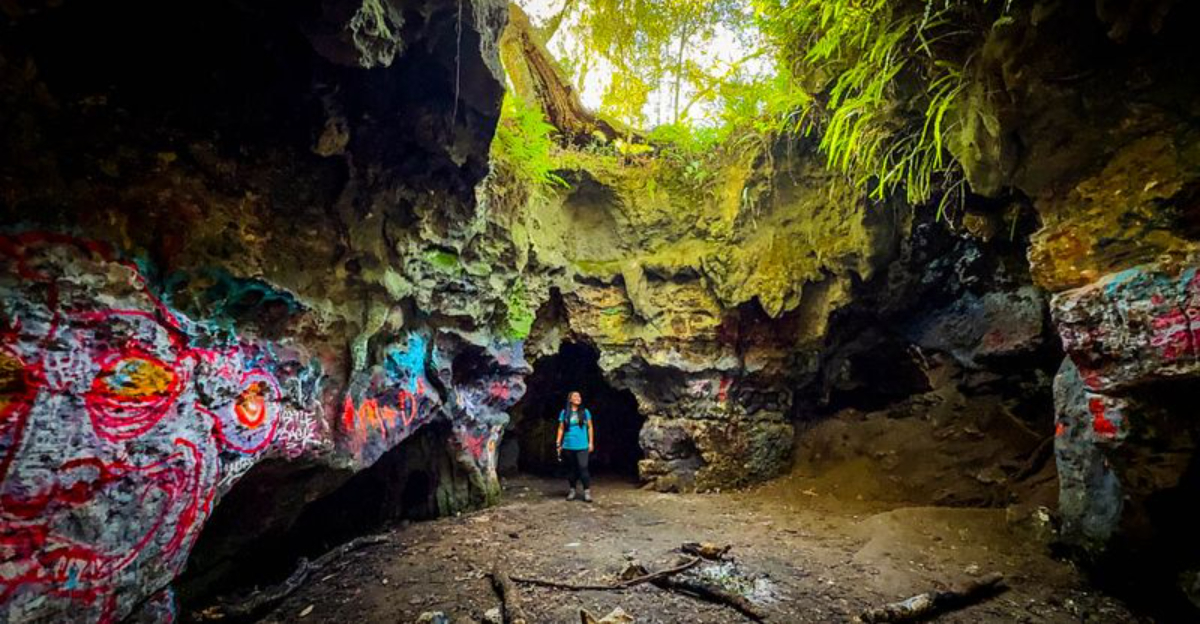
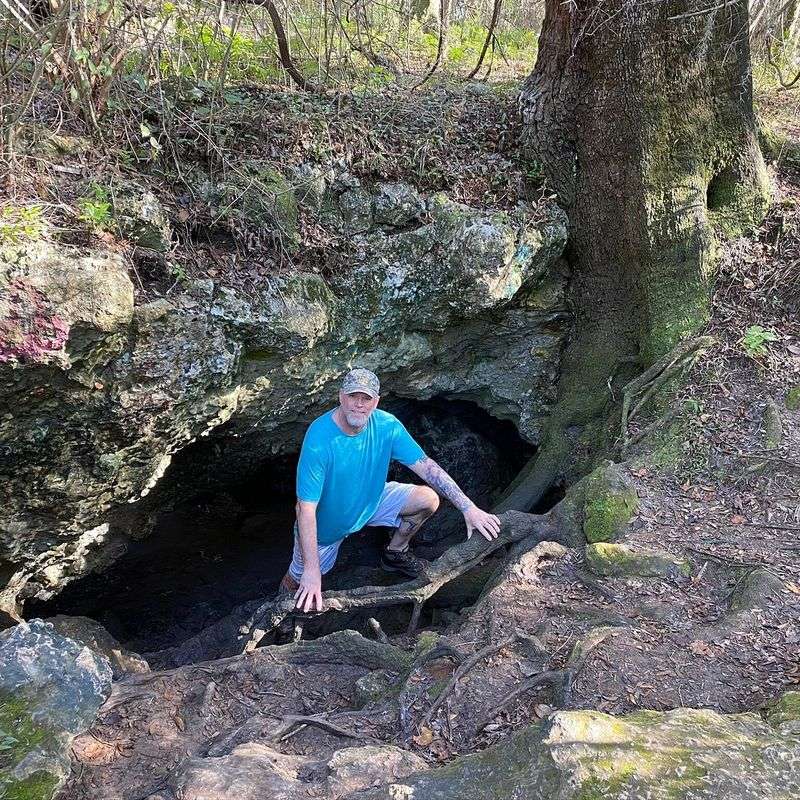
2. First Glimpse Of Dames Cave
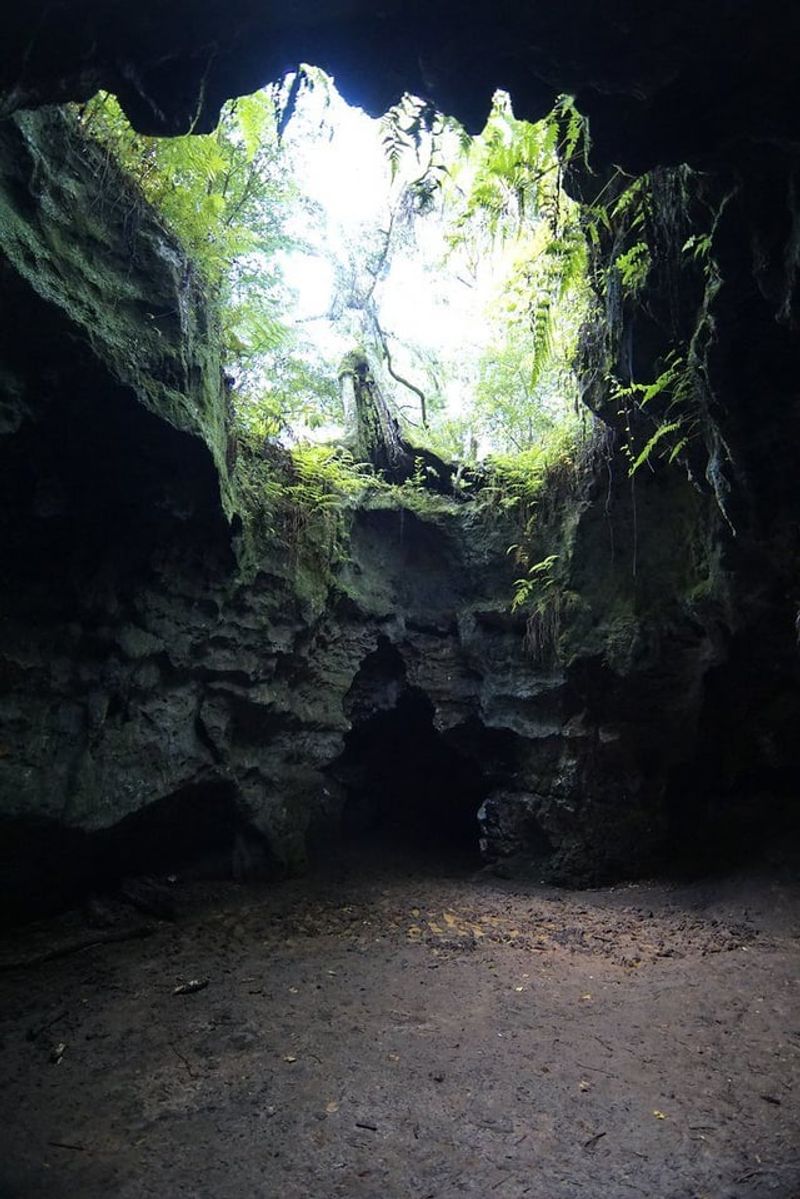
The first opening appears suddenly, like the earth exhaled. Limestone rims curve around a skylight, and shafts of sunlight slice into the cool dark. Stand at the lip and let your eyes adjust, then scan for safe footholds if you plan to descend.
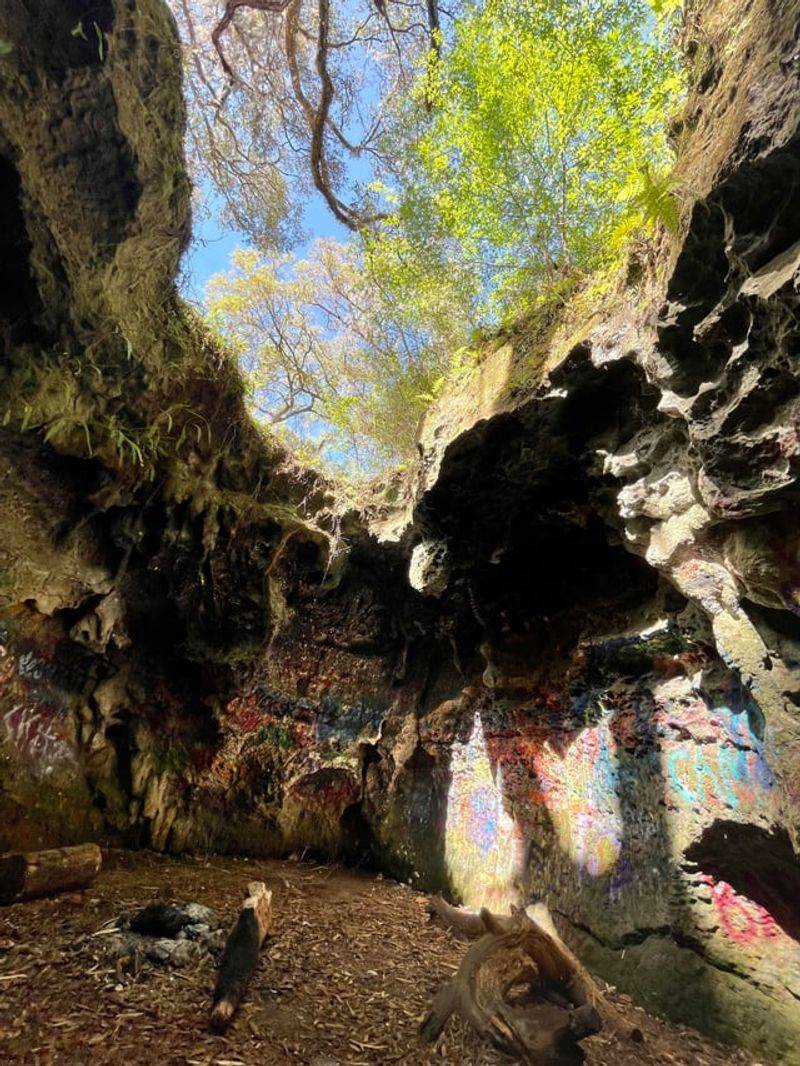
Photos pop here, especially when a sunbeam hits the cave floor. Watch your step, and do not toss stones since people might be below. You will notice graffiti in places, a sobering reminder to tread lightly and leave no trace.
Pause long enough to sense the temperature shift, hear a faint drip, and smell damp rock. This moment sets the pace for the rest of the loop, mixing awe with careful footing.
3. Navigating The Descent Safely
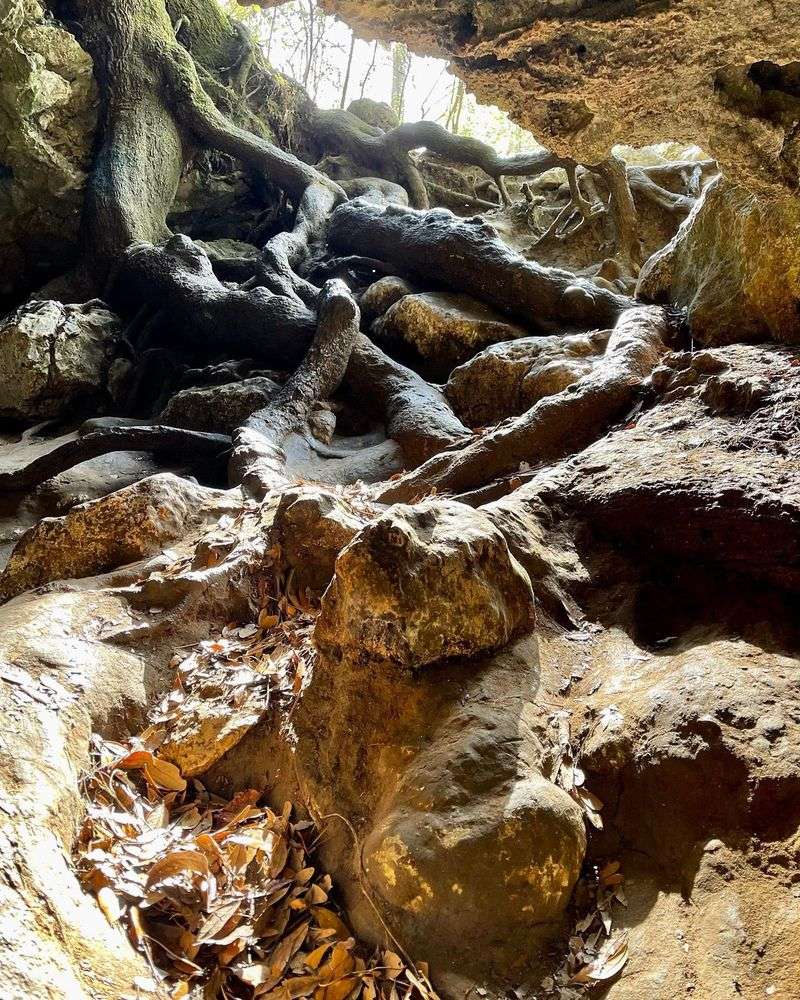
Descending into Dames Cave is optional, but if you go, move slow and deliberate. Test each foothold, keep three points of contact, and avoid slick patches where sand coats the limestone. A small headlamp helps you read the rock and plan your next move.
Gloves save knuckles and add grip, while sturdy soles handle edges better than sandals. Avoid crowded lips where crumbling rock increases risk. Communicate with anyone below before dislodging grit.
If it looks sketchy, skip it. The view from the rim still thrills, and there are other openings nearby that are easier to approach. Respect posted guidance, mind your group’s comfort level, and remember that safe choices keep the adventure going.
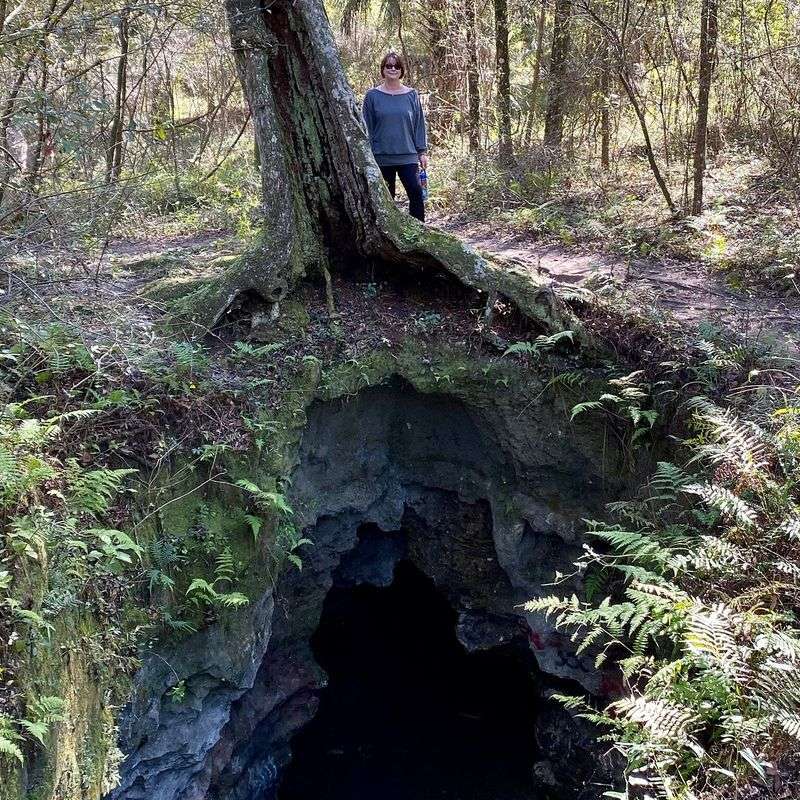
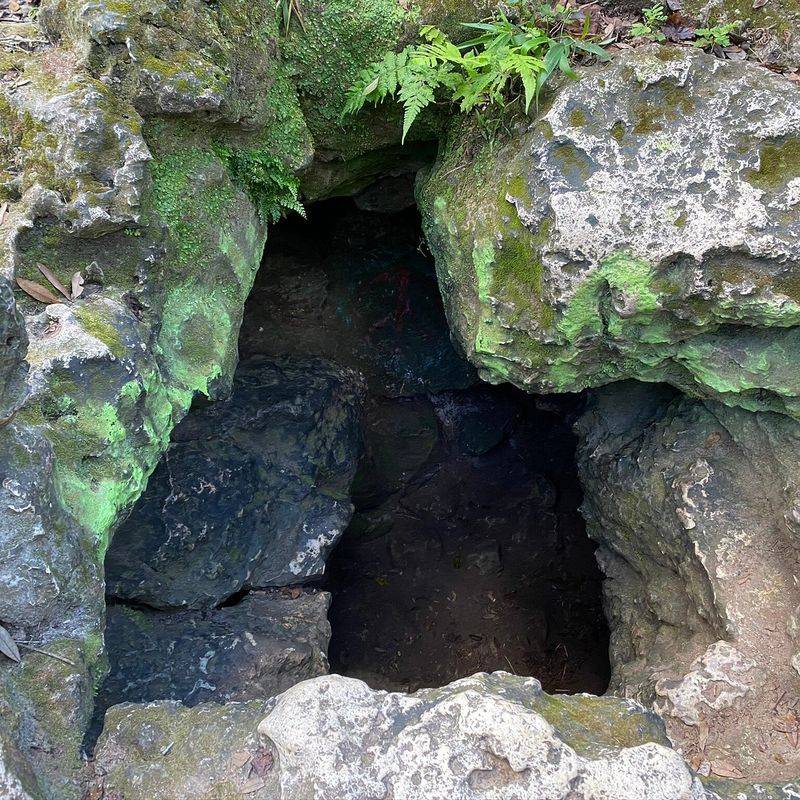
4. Exploring Side Caves And Sinkholes

Just beyond the main chamber, smaller caves and sinkholes dot the forest like hidden doorways. Some are shallow alcoves, others dip into shadow with narrow squeezes. Walk the perimeter, peer respectfully, and choose only features that match your comfort and lighting.
It is easy to stack short detours into a satisfying loop. Mark your route mentally so you do not get spun around among similar-looking pines. Check for loose rock, downed branches, or animal sign before committing to any crawl.
These side stops enrich the hike without adding miles. Slow down, listen for wind moving through limestone, and you will catch the magic here. Keep your pack light, your headlamp handy, and your curiosity dialed in.
5. Best Times, Hours, And Conditions
Dames Cave opens early, with posted hours typically 7 AM to 6 PM, and mornings are your friend. Cooler air settles in the caves, and light shafts make photos glow. Arrive close to opening time for quiet trails and a better parking experience.
Weekends bring families and climbers, so expect more activity. After heavy rain, the limestone can be slick and sandy edges shift underfoot. Summer heat builds fast, so carry extra water and plan a shorter loop.
Bring bug spray, sun protection, and a backup flashlight. If storms threaten, skip the descent and enjoy rim views instead. You will trade a little spontaneity for a safer, more photogenic visit with fewer surprises.
6. What To Pack And Leave No Trace
Keep your kit lean: water, small first aid, headlamp, gloves, and grippy closed-toe shoes. A phone with offline maps helps, and a compact trash bag lets you pack out what you bring. Add bug spray and sunscreen since sun and shade trade off along Trail 22.
Graffiti and litter have impacted parts of the main cave, which is frustrating to see. Counter it by modeling quiet care: no carving, no stickers, no chalk unless you are bouldering responsibly where permitted. Pack out microtrash like bar wrappers and tape.
Stay on durable surfaces, avoid fragile rims, and step carefully around vegetation. Your small choices matter here. Leave the place better than you found it, and the next hiker will feel that gratitude.
7. Alternates And Deeper Forest Wanders
If the main cave area feels busy or rough around the edges, keep moving deeper into the forest. Past the primary openings, the atmosphere shifts calmer, with long views through pines and soft breezes. You still get limestone character without the crowd energy.
Use the out-and-back to stitch extra miles and turn the visit into a half day. Watch for unmarked spurs and keep bearings with a downloaded map. The walking is gentle, punctuated by sandy stretches and scattered roots.
When energy dips, loop back toward Trail 22 and the car. You will return with that pleasantly dusty, sun-warmed feeling. The real win is balancing cave thrills with soothing forest time on the same hike.